Welcome to Comanche Trace. Get the latest news and available listings straight to your inbox.

The Creeks

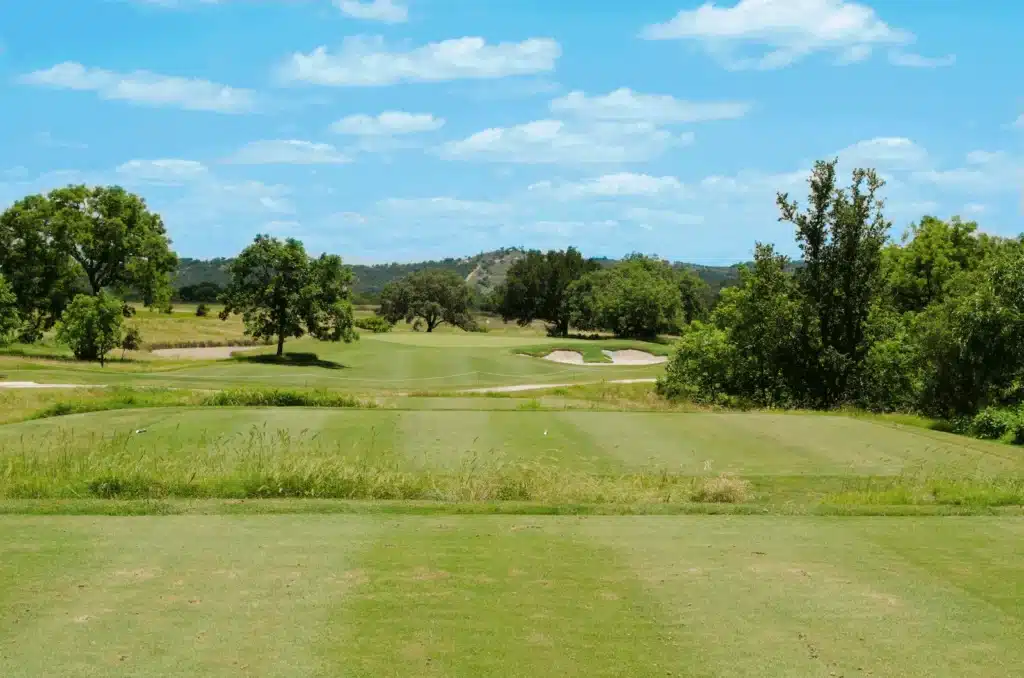
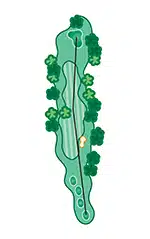
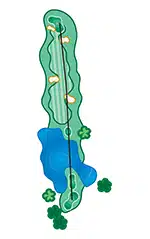
The Creeks nine was designed by father/son team, Jay and Carter Morrish. This course is set apart by the frequent creeks that wind throughout holes one through five. This course is a bit more challenging, but is the same as the other eighteen holes with a .5% to 1% slope on the greens, bent grass greens, and consistent bunkering. It offers variety with varying shot options and views, and qualities that are reminiscent of the original course – allowing The Creeks to blend seamlessly with the original eighteen holes.
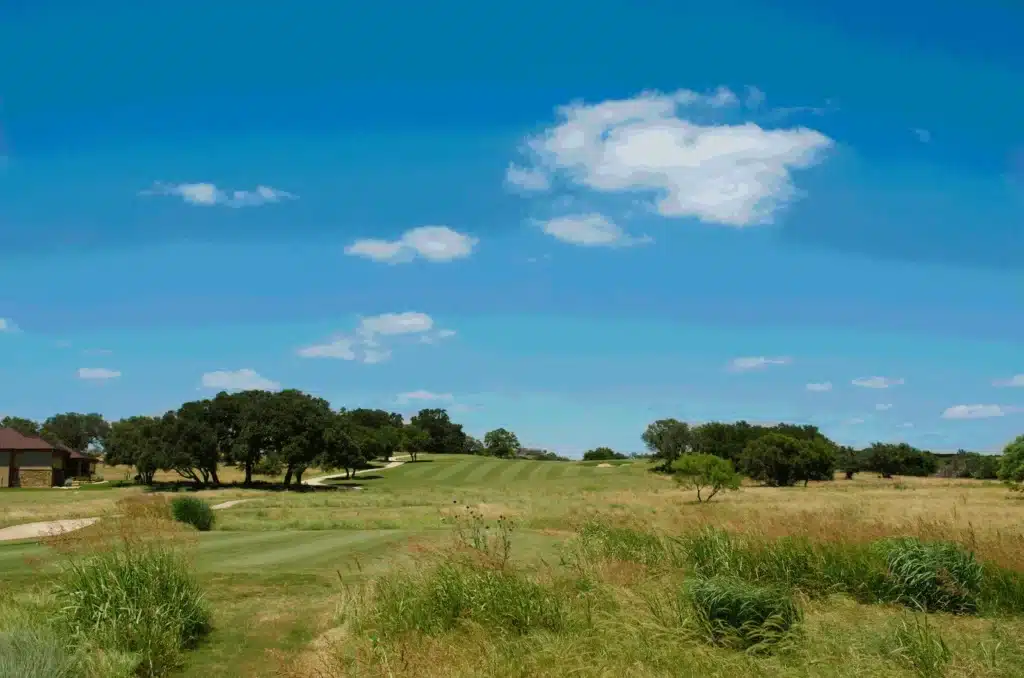
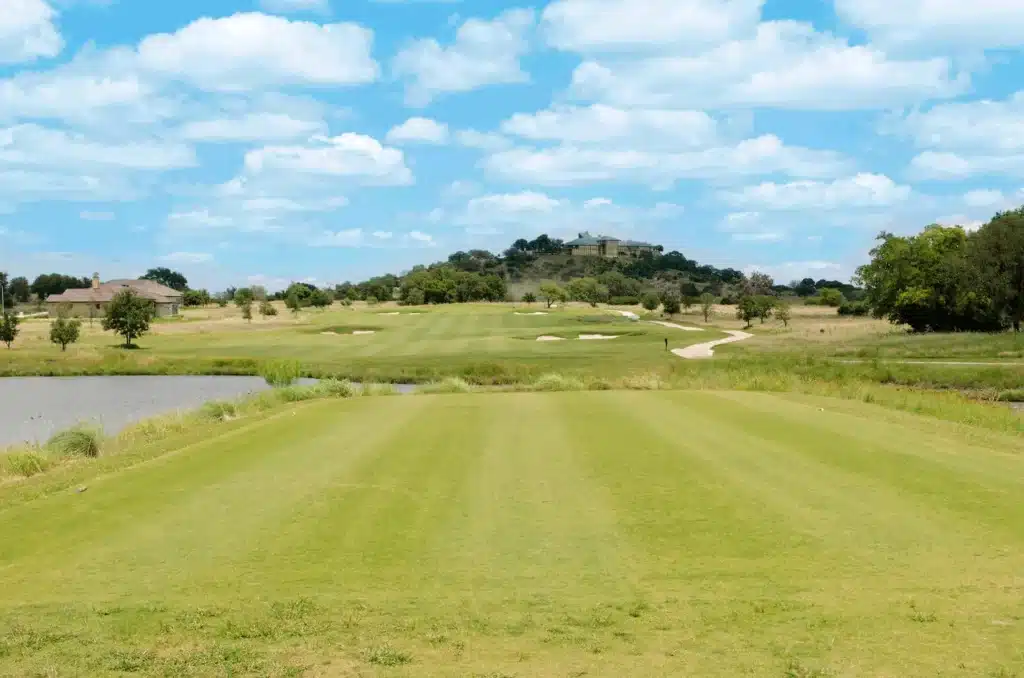
The Creeks fairways are a little more generous in width, and it has some of the best long-range Hill Country views of the three nine-hole courses. The Clubhouse, perched on the highest point of Comanche Trace, is not only a beautiful focal point from the course, but it also offers as a great aiming point on Holes #6 and #7.

Explore the creeks

Hole #1 - Par 4

This downhill hole provides one of the easier tee shots on this nine. Keep the ball on the right side of the fairway so your approach shot is angled away from the pond on the right side of the green.

417

391

361

355

316

Hole #2 - Par 4

A demanding tee shot with a creek running down the left side of the fairway and large trees down the right that will block out any approach shot. Make sure you have the correct club if the pin is the back of the green, any approach shot short of the middle of the green will return down the tier to the front of the green leaving a long putt.

438

407

373

329

318

Hole #3 - Par 3

This long par 3 plays into the prevailing wind. Pick your club wisely to get over the front, right trap and place your ball in the correct quadrant of this large green.

204

177

154

148

130

Hole #4 - Par 5

A three shot hole, except for the longest of players, this par 5 plays into the prevailing wind. On your second shot you have a choice to go for the green, which requires a shot that carries two creeks or layup between the two creeks to leave yourself a 140-130 yard shot for your third. Any approach left of the green will find the creek bordering the left side of the green.

578

552

529

506

458

Hole #5 - Par 3

This par 3 is a mid iron, where it is better to miss long, where the green is wider. Any shot that lands on the front of the green will be repelled of the front by the false front that guards the green

164

147

141

121

118

Hole #6 - Par 4

The tee shot on this par 4 is uphill and you should favor the middle to left side. Your second shot is downhill so take less club. Any shot short will have a chance to roll up on this unprotected green.

466

433

398

358

349

Hole #7 - Par 4

You have a tremendous view of the clubhouse on this uphill par 4. You must fit your ball between the two fairway bunkers to find the fairway on this long hole. The second shot is uphill with a long to medium iron. You will not be able to see the bottom of the flag or the putting surface so trust your yardage to get the ball close.

460

430

395

288

278

Hole #8 - Par 5

The second par 5 on this side requires precise shots to walk away with a good score. Align your tee shot between the left fairway bunker and the grove of trees on the right to hit the fairway. The second shot is a risk/reward choice. If you decide to go for the green the landing area gets narrower as you get closer to the green. Otherwise you should layup to your favorite wedge distance to get the ball close on this green that is divided into three sections.

561

530

497

469

459

Hole #9 - Par 4

This hole plays slightly downhill off the tee so a fairway wood is the preferred choice. The second shot plays downhill, as well and at least two clubs shorter. With it being that far downhill be sure to judge the wind correctly to get the ball close.

447

403

372

349

341