Welcome to Comanche Trace. Get the latest news and available listings straight to your inbox.

The Valley

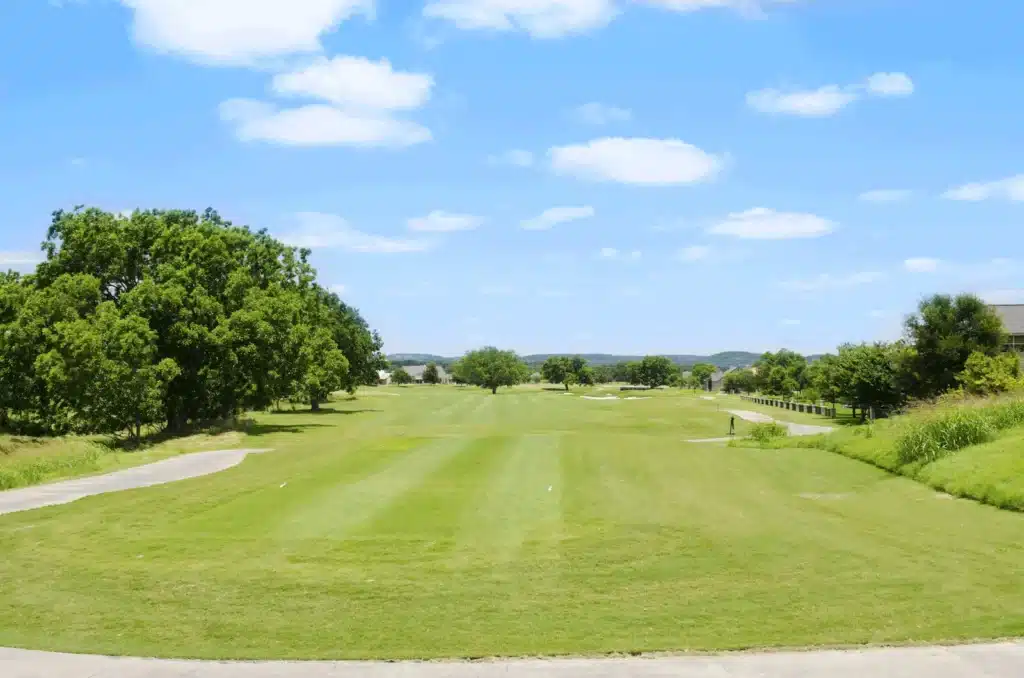
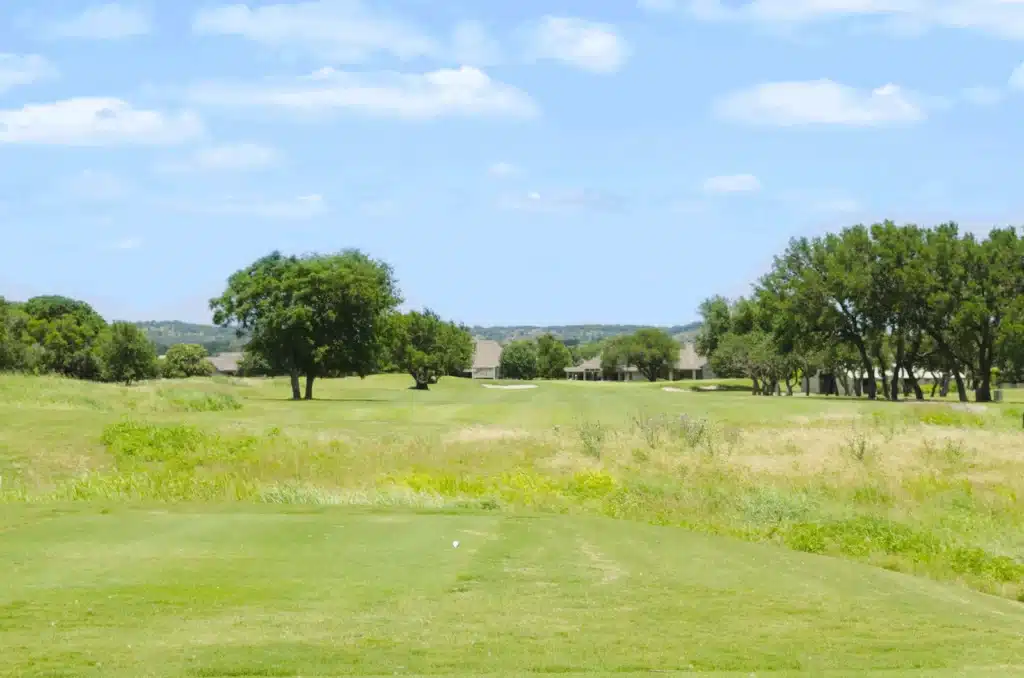
Tom Kite, Roy Bechtol, and Randy Russell were engaged to create the original eighteen holes. Kite worked his way down the valley starting at the high point, thus the name The Valley was established. The course has beautiful contours, and a number of live oak trees, including Old Gnarly on Hole #5 that is over 100 years old. This course directs the player north toward the front of the community, makes a u-shaped bend and heads back uphill toward the southwest.

Greens, tees, and fairways are always in wonderful shape. Green contours and sizes perfectly blend into the topography and take in the natural terrain. Adding water features and using the native grasses to shape and frame a backdrop on each hole, allows the golfer to focus on where they are hitting.

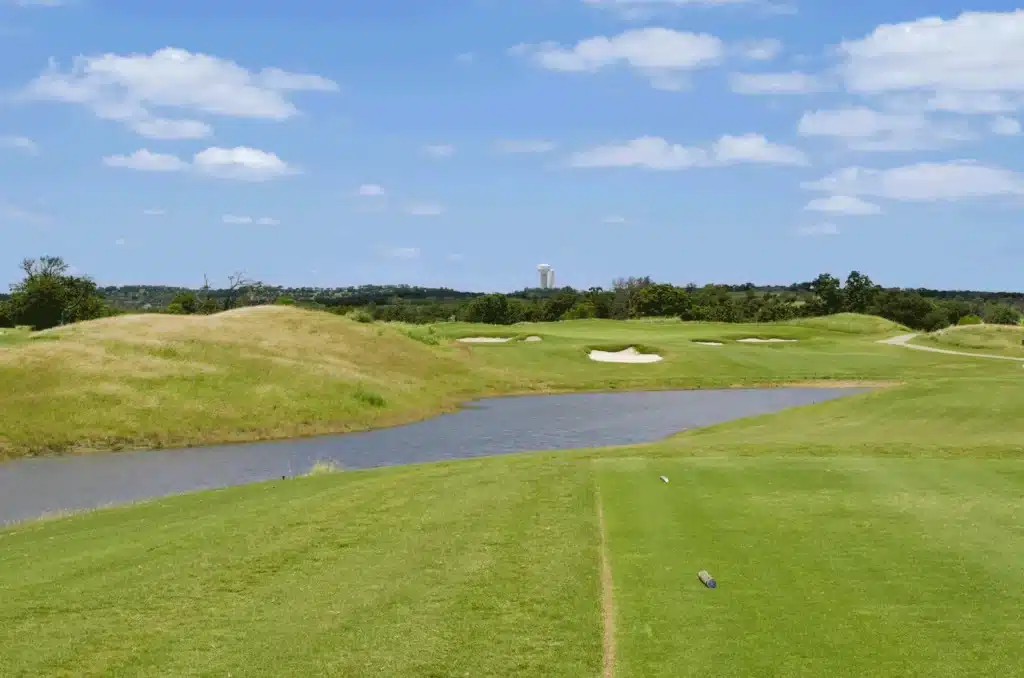
Bunkering has been matched on all twenty-seven holes. Nothing is forced with the natural topography, so it has a natural look. The Valley course shows unique character with its original rock sheep barn located on the #5 green, with restrooms and a cart path through its center. The initial five holes typically play downwind, and then you begin playing into the wind as you turn south. The holes lay into the hillside and provide natural bunkering to give you a great eye off the tee to land your ball. The fairway mounds are subtly contoured and do not require an awkward stance. The finishing hole, #9, is arguably the best of the three nines. It is a solid, par 4 up the hill with great bunkering throughout and a slight elevation shot into the wind – definitely the most demanding of the finishing holes. Birdies are hard to come by here!

Explore the valley

Hole #1 - Par 4

This is a beautiful and relatively tame starting hole. The elevated tee, which is some 80 feet above the landing area, gives you a breathtaking panorama of the Texas Hill Country. Aim your drive towards the lone oak and with good execution you should have a short iron into the green. This is a good opportunity to get your day off to an “under par” start.

390

373

359

342

285

Hole #2 - Par 4

First of the numerous really strong par 4’s on the course. Plenty of fairway is to the left for those who want to avoid the water, but in reality, the lake is out of play except for the longest of hitters. A fine aiming point is the pot bunker. From there the hole is straight forward with a relatively flat green that is open in front. But beware of the second shot that leaks a bit to the right. That lake you could not reach off the tee is right there awaiting any poorly played 2nd shot.

467

428

417

388

357

Hole #3 - Par 3

This is a great par three that has been modeled after some of the old classic designs. The tiered green affords numerous pin locations. And anything less than a good tee shot will likely find either of the deep bunkers hoarding both the front left and front right.

204

191

180

152

133

Hole #4 - Par 5

This may be the best par 5-birdie opportunity on the course, but a true risk reward hole. Three of the most beautiful pecan trees in the central Texas area will force you to make a decision of how to play this hole. Hitting a long drive up to the right side close to the fairway bunkers opens the hole up and gives you the best look at the green. While anything up the left side will be blocked out by the first of those pecans. The longer hitters should have the opportunity to go for the green in two.

523

497

463

439

407

Hole #5 - Par 4

A relatively short but solid par 4 requires more accuracy than length off the tee. The severely undulating green will require the touch of a surgeon to walk to #6 tee with a smile on your face. We anticipate that there will be numerous birdies on this hole-but there will be lots of three putts too! Of course, hitting that short iron close to the pin should greatly reduce your putting problems. Be sure to take refreshment in the historic halfway barn because you are now a mile from home and the next few holes will require all you’ve got.

362

335

312

267

254

Hole #6 - Par 4

This par 4 fairway is ample and even though the safer route is to the right away from the water, a bolder drive closer to the lake will shorten the second shot into the green. You can choose how bold you want to be by biting off as much as you dare. Be sure to hit enough club on your approach shot because the lake is perilously close to the front edge of the green. This bi-level green will provide some interesting putting opportunities. But there should be numerous one putts because if you are on the proper level you cannot be too far away from the hole.

396

376

346

327

287

Hole #7 - Par 5

A bear of a par 5, uphill and into the prevailing wind, this will test the best of the players. Avoiding the deep fairway bunkers both on the tee shot and the second is a must! This large green will accommodate some errant shots—provided they are hit long enough. But the shape of the green will afford some challenging tournament pin placements when on the right side.

544

518

476

445

419

Hole #8 - Par 3

A partially blind par 3 that will test your ability to choose the correct club, this hole looks far more difficult than it will play. The two gaping bunkers set into the ridge are well short of the green. But just how short is the question? The green slopes gently from the left to the right and any shot landing short and left of the green should feed onto the green close to a right side pin placement. A little bit of knowledge will go a long way when playing #8.

207

176

172

153

106

Hole #9 - Par 4

The inability to avoid any of the “string of pearls” bunkers could prove far more expensive that any trip to the Mikimoto Jewelry Store. Perhaps the toughest par 4 on the course, this will demand all of your “A” game. Be sure to hit enough club as it will be difficult, if not impossible, to hit past the pin. Playing to the right of the green avoiding the bunkers left can be rewarding, as many shots right will bounce onto the green.

448

415

403

348

307